


Heutzutage ist die Arbeit vieler Menschen untrennbar mit dem Computer verbunden, und die Bürotastatur ist zu einem der Gegenstände geworden, die der menschliche Körper berührt. Computertastaturen können ziemlich keimbelastet sein, wenn man sie nicht reinigt. Regelmäßiges Reinigen dient nicht nur der Optik. Es trägt auch dazu bei, dass sie besser funktionieren, länger halten und gesund bleiben, insbesondere wenn man sich einen Arbeitsplatz teilt.
Wichtige Werkzeuge zum Reinigen Ihrer Computertastatur
Bevor Sie mit der Reinigung beginnen, legen Sie Ihre Werkzeuge bereit. Eine weiche Bürste eignet sich hervorragend zum Staubwischen. Druckluft hilft, Schmutz aus kleinen Zwischenräumen zu entfernen. Mikrofasertücher reinigen die Oberfläche, ohne sie zu zerkratzen.
Für eine gründliche Reinigung ist ein Tastenkappenabzieher hilfreich. Falls Sie keinen haben, funktioniert auch ein kleiner Schraubendreher. Mischen Sie etwas mildes Spülmittel mit warmem Wasser, um eine gute Reinigungslösung herzustellen. Sie können auch Desinfektionstücher mit Isopropylalkohol verwenden. Halten Sie einen kleinen Behälter bereit, in dem Sie die Tasten während der Reinigung einweichen können.
Je nachdem, was Sie haben, können Sie auch andere Dinge verwenden. Anstelle von Druckluft kann ein kleiner Staubsauger mit Bürste verwendet werden. Wattestäbchen eignen sich hervorragend zum Reinigen rund um die Tasten.

Wöchentliche Wartungsroutine für die Tastaturreinigung
Schnelles Abstauben und Reinigen von Oberflächen
Ziehen Sie zunächst den Stecker Ihrer Computertastatur . Dies ist wichtig für die Sicherheit. Entfernen Sie Staub und Krümel zwischen den Tasten mit einer weichen Bürste. Reinigen Sie unbedingt die gesamte Tastatur, insbesondere die Bereiche, in denen sich Ihre Finger normalerweise befinden, da diese schneller verschmutzen.
Verwenden Sie anschließend Druckluft. Halten Sie die Dose schräg und sprühen Sie in kurzen Stößen. So entfernen Sie Schmutz auch an schwer erreichbaren Stellen. Mit der Bürste und Druckluft entfernen Sie den größten Teil des Schmutzes von Ihrer Tastatur.

Desinfektion häufig berührter Bereiche
Reinigen Sie die Oberfläche Ihrer Tastatur mit Desinfektionstüchern mit Alkohol. Achten Sie darauf, dass nicht zu viel Feuchtigkeit in die Nähe der Tasten gelangt. Achten Sie besonders auf die Stellen, die Sie am häufigsten berühren, wie die Leertaste und die Eingabetaste. Falls Ihre Tastatur über eine Handballenauflage verfügt , reinigen Sie diese ebenfalls. Lassen Sie die Tastatur vollständig trocknen, bevor Sie sie wieder anschließen. Dies dauert in der Regel etwa 10–15 Minuten.
Tun Sie dies jede Woche, um Ihre Tastatur sauber und keimfrei zu halten. Dies ist wichtig für Menschen, denen ihre Gesundheit am Herzen liegt, und für diejenigen, die viel reisen und verschiedene Arbeitsbereiche nutzen.
Einmal im Monat eine gründliche Reinigung Ihrer Computertastatur
Strategie zum Entfernen der Tastenkappe
Bevor Sie Tasten entfernen, machen Sie ein Foto von Ihrer Tastatur. So können Sie die Tasten wieder an die richtige Stelle bringen, insbesondere wenn Sie eine kabellose Tastatur mit einem anderen Layout oder speziellen Funktionstasten haben.
Ziehen Sie mit einem Schlüsselabzieher vorsichtig jede Taste gerade nach oben. Drehen Sie sie nicht, sonst könnten Sie den darunterliegenden Schalter beschädigen. Nehmen Sie die Tasten Stück für Stück ab, nicht alle auf einmal. So gehen keine Kleinteile verloren und Sie behalten die Übersicht.
Legen Sie die abgenommenen Tasten in eine Schüssel mit warmem Wasser und etwas Spülmittel. Lassen Sie sie 15–20 Minuten einweichen, während Sie die Tastatur darunter reinigen.
Gründliche Grundreinigung
Wenn Sie die Tasten abnehmen, sehen Sie Staub und Schmutz rund um die Schalter und auf der Tastaturbasis. Blasen Sie alles mit Druckluft weg und entfernen Sie anschließend alles Festsitzende mit einer Bürste. Bei stark verschmutzten Stellen tauchen Sie ein Wattestäbchen in Reinigungsalkohol und reinigen Sie damit die Bereiche um jeden Schalter. Ziehen Sie den Stecker der Tastatur und lassen Sie sie vollständig trocknen, bevor Sie sie wieder zusammenbauen.
Durch diese Art der Reinigung wird der Schmutz entfernt, den Sie durch einfaches Abwischen der Oberfläche nicht erreichen können. Dadurch funktionieren die Tasten besser und Probleme mit Ihrer Tastatur werden vermieden.
Tastenkappen-Restaurierung
Nachdem die Tasten eingeweicht sind, spülen Sie sie mit klarem Wasser ab und trocknen Sie sie mit einem weichen Tuch ab. Bei stark verschmutzten Tasten können Sie diese vorsichtig mit einer weichen Zahnbürste und Seifenlauge schrubben. Stellen Sie sicher, dass die Tasten vollständig trocken sind, bevor Sie sie wieder einsetzen. Wasser unter den Tasten kann die Tastatur beschädigen.
Bringen Sie die Tasten wieder an, indem Sie sie gerade nach unten drücken, bis sie einrasten. Verwenden Sie das zuvor aufgenommene Foto, um sicherzustellen, dass Sie die Tasten an den richtigen Stellen platzieren.

Fehlerbehebung bei häufigen Problemen mit Ihrer Tastatur
Tasten, die klemmen oder nicht funktionieren
Regelmäßiges Reinigen der Tastatur hilft, die meisten Probleme zu vermeiden. Manchmal klemmen die Tasten aber trotzdem oder funktionieren nicht. Klemmende Tasten werden oft durch Schmutz oder etwas Klebriges verursacht, das den Schalter blockiert. Nehmen Sie die Taste ab und reinigen Sie sie und den Schalter mit Reinigungsalkohol auf einem Wattestäbchen.
Wenn eine Taste nicht funktioniert, kann dies an einem Verbindungsproblem liegen, insbesondere bei einer kabellosen Tastatur . Überprüfen Sie die Batterien und schließen Sie die Tastatur erneut an, bevor Sie glauben, sie sei defekt. Manchmal funktioniert die Taste auch einfach aufgrund von Schmutz nicht. Reinigen Sie sie daher zuerst.
Klebrige Schaltmechanismen
Wenn sich Ihre Tasten langsam anfühlen oder nicht immer richtig funktionieren, sind die Schalter möglicherweise verschmutzt. Nachdem Sie die Tasten entfernt haben, blasen Sie mit Druckluft den Schmutz um die Schalter herum aus. Sollten sie immer noch kleben, geben Sie vorsichtig etwas Reinigungsalkohol auf ein Wattestäbchen und reinigen Sie damit den unteren Bereich des Schalters. Stellen Sie sicher, dass der Alkohol vollständig getrocknet ist, bevor Sie die Taste erneut drücken.
Verwenden Sie zum Reinigen der Schalter niemals Wasser, da Wasser die Tastatur beschädigen kann.

Wie oft sollten Sie Ihre Computertastatur reinigen?
Planen Sie eine Reinigung zwei- bis dreimal im Monat ein. Wenn Sie Ihre Computertastatur sehr häufig verwenden oder in einer staubigen Umgebung arbeiten, ist möglicherweise eine häufigere Reinigung erforderlich. Wenn Sie Ihre Tastatur gelegentlich verwenden, können Sie sie dreimal im Monat reinigen.
Notieren Sie Ihren Reinigungsplan und halten Sie sich daran. Wenn Sie Ihre Tastatur nicht oft genug reinigen, besteht die Gefahr schwerwiegenderer Probleme, die eine Reparatur oder sogar einen Austausch erforderlich machen.
Weitere Überlegungen zur Tastaturwartung
Neben der Reinigung gibt es noch einige weitere Möglichkeiten, die Lebensdauer und Leistung Ihrer Tastatur zu verlängern. Vermeiden Sie Flüssigkeiten und verschütten Sie nichts auf Ihrer Tastatur. Verwenden Sie in schmutzigen Umgebungen eine Tastaturabdeckung.
Wenn Sie eine kabellose Tastatur haben, überprüfen Sie unbedingt die Batterien. Schwache Batterien können dazu führen, dass sich die Tastatur merkwürdig verhält, was den Eindruck erweckt, dass sie gereinigt werden muss.
Wenn Sie Ihre Tastatur unterwegs mitnehmen, bewahren Sie sie in einer Schutzhülle auf. Wenn die Tastatur überhitzt oder eiskalt wird, lassen Sie sie vor der Verwendung wieder auf Zimmertemperatur abkühlen.
Starten Sie Ihre Tastaturaktualisierung
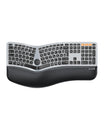
Ihre Tastatur, insbesondere eine ergonomische Tastatur , ist für komfortables Arbeiten unerlässlich. Halten Sie sie sauber, um Ihre Gesundheit zu schützen, ihre Effizienz zu steigern und ihre Lebensdauer zu verlängern. Schaffen Sie einen gesunden Arbeitsplatz . Beginnen Sie diese Woche mit dem Abstauben und planen Sie für nächsten Monat eine gründliche Reinigung ein. Sowohl Ihre Finger als auch Ihre Produktivität werden es Ihnen danken, denn es ist eine einfache Aufgabe mit erheblichen Vorteilen.

